Table of Contents
Proper Tools and Techniques for Removing Plastic push to connect fittings
Plastic push to connect fittings are commonly used in plumbing and pneumatic systems due to their ease of installation and removal. However, there may come a time when you need to remove these fittings for maintenance or repair purposes. In this article, we will discuss the proper tools and techniques for removing plastic push to connect fittings.
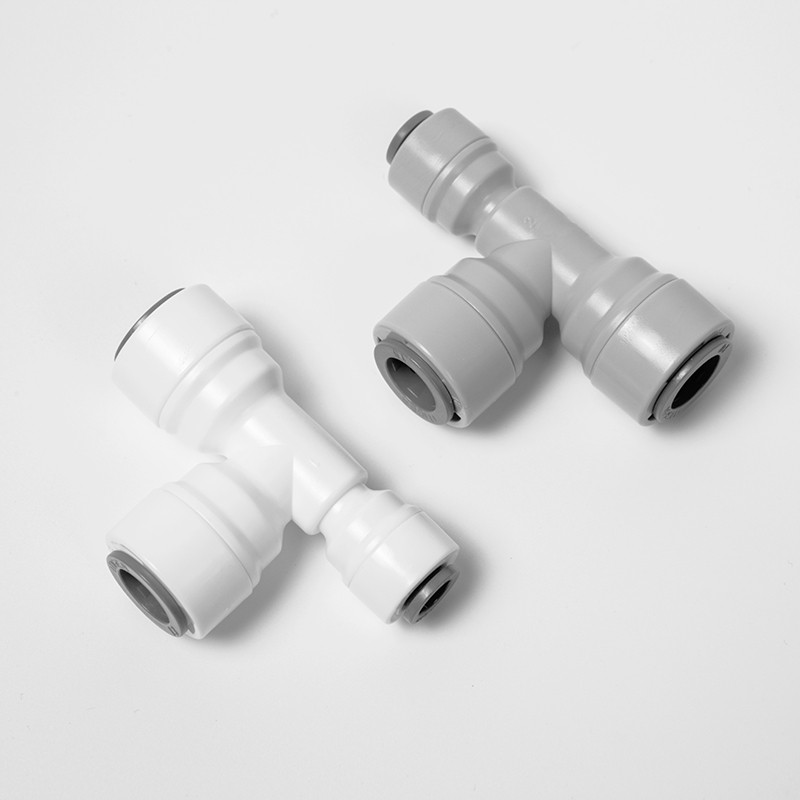
When it comes to removing plastic push to connect fittings, having the right tools is essential. One of the most important tools you will need is a disconnect clip. This small, plastic tool is designed to release the locking mechanism inside the fitting, allowing you to easily remove the tubing. Disconnect clips are inexpensive and can be purchased at most hardware stores or online.
To begin the removal process, start by locating the release collar on the fitting. This is the small, plastic ring that surrounds the tubing. Insert the disconnect clip into the fitting, making sure it is fully engaged with the release collar. Apply gentle pressure to the clip while pulling the tubing away from the fitting. The release collar should slide back, allowing the tubing to be removed.
It is important to note that some fittings may require a bit more force to remove. If you are having trouble disconnecting the tubing, try wiggling it back and forth while applying pressure to the disconnect clip. Be careful not to use too much force, as this can damage the fitting or tubing.
If you do not have a disconnect clip on hand, there are alternative methods for removing plastic push to connect fittings. One common technique is to use a pair of needle-nose pliers to manually release the locking mechanism. Simply grip the release collar with the pliers and pull it back while simultaneously pulling the tubing away from the fitting. This method may require more effort than using a disconnect clip, but it can be effective in a pinch.
Another option for removing plastic push to connect fittings is to use a small flathead screwdriver. Insert the screwdriver into the fitting alongside the tubing and gently pry the release collar back. Be careful not to apply too much pressure, as this can cause damage to the fitting or tubing. Once the release collar is pulled back, the tubing should easily slide out of the fitting.
In some cases, you may encounter fittings that are stubborn and difficult to remove. If this happens, it may be necessary to cut the tubing close to the fitting and install a new fitting. While this is not ideal, it is sometimes the only option when dealing with stubborn fittings.
In conclusion, removing plastic push to connect fittings can be a simple and straightforward process when done correctly. By using the proper tools and techniques, you can safely and effectively remove these fittings without causing damage. Whether you choose to use a disconnect clip, needle-nose pliers, or a screwdriver, always remember to exercise caution and patience to avoid any mishaps. With a little practice and know-how, you can become proficient at removing plastic push to connect fittings in no time.
Step-by-Step Guide to Safely Removing Plastic Push to Connect Fittings
Plastic push to connect fittings are commonly used in plumbing and pneumatic systems for their ease of installation and removal. However, there may come a time when you need to remove these fittings for maintenance or repair purposes. In this article, we will provide you with a step-by-step guide on how to safely remove plastic push to connect fittings without causing damage to the fittings or the surrounding components.
The first step in removing plastic push to connect fittings is to ensure that the system is depressurized. This is crucial to prevent any accidents or injuries during the removal process. Turn off the supply of air or water to the system and release any remaining pressure by activating the system.
Once the system is depressurized, you can proceed to remove the plastic push to connect fitting. Start by locating the release collar on the fitting. This is a small plastic ring that surrounds the tubing and holds it in place. Using your fingers, push the release collar towards the fitting while simultaneously pulling the tubing out of the fitting. This action will release the grip of the fitting on the tubing and allow you to remove it easily.
If you find it difficult to remove the tubing by hand, you can use a pair of pliers to grip the release collar and pull it towards the fitting. Be careful not to apply too much force as this can damage the fitting or the tubing. Gentle and steady pressure should be enough to release the tubing from the fitting.
| Model | Tube(a) | Stem(b) |
|---|---|---|
| 1801-A | 1/4 | 1/4 |
| 1801-C | 1/4 | 3/9 |
Once the tubing is removed, inspect the fitting for any damage or wear. If the fitting appears to be in good condition, you can reuse it for future installations. However, if the fitting is damaged or worn out, it is recommended to replace it with a new one to ensure the integrity of the system.
After removing the plastic push to connect fitting, you may need to clean the tubing and the fitting to remove any debris or contaminants. Use a clean cloth or a mild detergent to wipe down the surfaces and ensure that they are free from any dirt or residue. This will help prevent any blockages or leaks in the system when you reinstall the fitting.
| Model | Tube(a) | Stem(b) |
|---|---|---|
| 1801-A | 1/4 | 1/4 |
| 1801-C | 1/4 | 3/32 |
Once the tubing and the fitting are clean, you can proceed to reinstall the fitting. Insert the tubing into the fitting until it reaches the bottom and make sure that it is seated securely. Push the tubing in until you hear a click, which indicates that the tubing is properly locked in place.
Finally, test the system to ensure that the fitting is securely in place and that there are no leaks or issues. Turn on the supply of air or water and check for any signs of leakage or pressure loss. If everything looks good, you have successfully removed and reinstalled the plastic push to connect fitting.
In conclusion, removing plastic push to connect fittings is a simple process that can be done safely and efficiently with the right tools and techniques. By following the steps outlined in this article, you can ensure that the fittings are removed without causing any damage to the system or the components. Remember to always depressurize the system before removing the fittings and to inspect and clean the components before reinstalling them. With proper care and attention, you can maintain the integrity of your plumbing or pneumatic system for years to come.