Table of Contents
Proper Techniques for Connecting plastic push fit to Copper Pipe
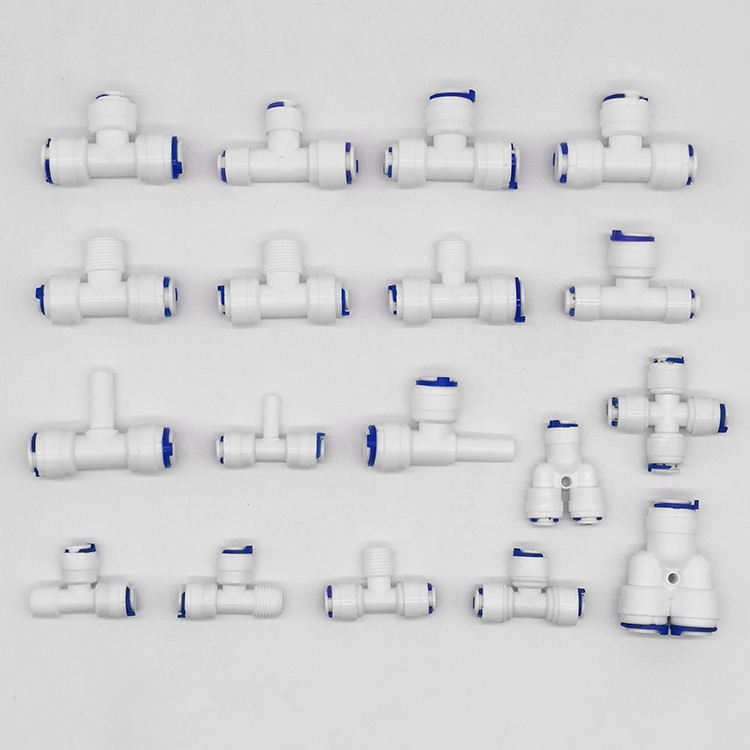
Connecting plastic push fit fittings to copper pipe is a common task in plumbing projects. Whether you are repairing a leak or installing new fixtures, it is important to ensure a secure and watertight connection. In this article, we will discuss the proper techniques for connecting plastic push fit fittings to copper pipe.
First and foremost, it is essential to prepare the copper pipe before connecting the plastic push fit fitting. Start by cutting the copper pipe to the desired length using a pipe cutter. Make sure to cut the pipe cleanly and squarely to ensure a proper fit. Once the pipe is cut, use a deburring tool to remove any burrs or rough edges from the cut end of the pipe. This will help prevent leaks and ensure a tight seal.
Next, make sure the copper pipe is clean and free of any debris or dirt. Use a pipe cleaning brush or emery cloth to clean the outside of the pipe thoroughly. This will help the push fit fitting to grip the pipe securely and create a watertight seal. Additionally, make sure to clean the inside of the push fit fitting with a pipe cleaning brush to remove any dirt or debris that could prevent a proper connection.
Before connecting the plastic push fit fitting to the copper pipe, it is important to ensure that the pipe is properly inserted into the fitting. Push fit fittings have a colored indicator ring that will slide down the fitting when the pipe is fully inserted. Make sure the pipe is pushed all the way into the fitting until the indicator ring is at the base of the fitting. This will ensure a secure connection and prevent leaks.
Once the pipe is properly inserted into the push fit fitting, it is important to test the connection for leaks. Turn on the water supply and check for any leaks around the fitting. If you notice any leaks, turn off the water supply and recheck the connection. Make sure the pipe is fully inserted into the fitting and that the fitting is securely attached to the pipe. If leaks persist, you may need to replace the fitting or consult a professional plumber for assistance.
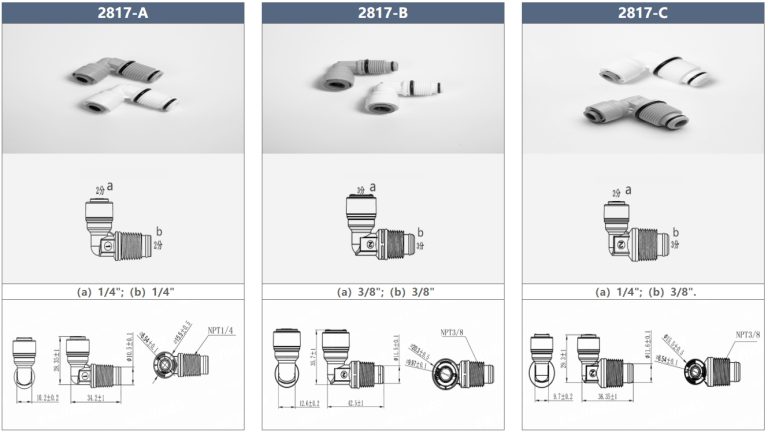
| Model | Tube(a) | Stem(b) |
|---|---|---|
| 1801-A | 1/4 | 1/4 |
| 1801-C | 1/4 | 3/37 |
In conclusion, connecting plastic push fit fittings to copper pipe is a straightforward process that can be easily accomplished with the right tools and techniques. By properly preparing the copper pipe, cleaning the fittings, and ensuring a secure connection, you can create a watertight seal that will last for years to come. Remember to test the connection for leaks before completing your plumbing project to ensure a successful installation. With these proper techniques, you can confidently connect plastic push fit fittings to copper pipe in your next plumbing project.
Step-by-Step Guide for Successfully Joining Plastic Push Fit and Copper Pipe
Plastic push fit fittings have become increasingly popular in plumbing projects due to their ease of use and versatility. They are a convenient option for connecting pipes without the need for soldering or specialized tools. However, when it comes to joining plastic push fit fittings to copper pipes, some DIY enthusiasts may be unsure of the correct procedure. In this article, we will provide a step-by-step guide on how to successfully connect plastic push fit fittings to copper pipes.
The first step in connecting plastic push fit fittings to copper pipes is to ensure that both the plastic fitting and the copper pipe are clean and free of any debris. Use a pipe cleaner or sandpaper to remove any dirt, grease, or oxidation from the surface of the copper pipe. This will help to ensure a secure and leak-free connection.
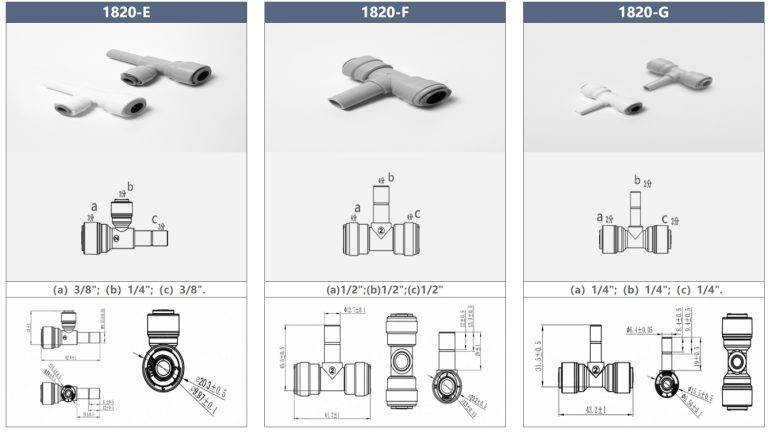
| Model | Tube(a) | Stem(b) |
|---|---|---|
| 1801-A | 1/4 | 1/4 |
| 1801-C | 1/4 | 3/23 |
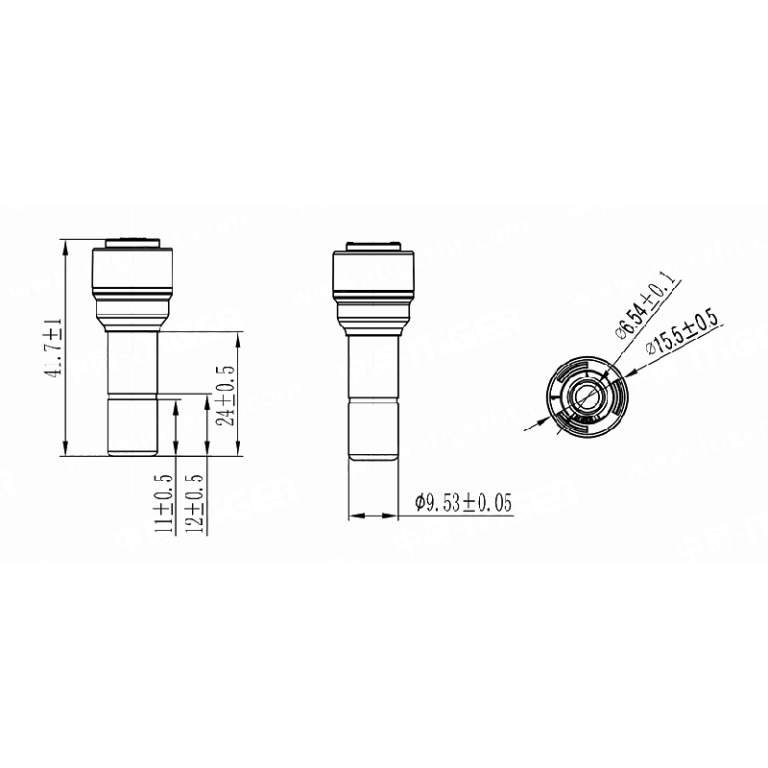
Next, measure and mark the copper pipe to the desired length using a pipe cutter. Make a clean, straight cut on the copper pipe to ensure a proper fit with the plastic push fit fitting. It is important to ensure that the cut is square and free of any burrs or rough edges that could prevent a tight seal.
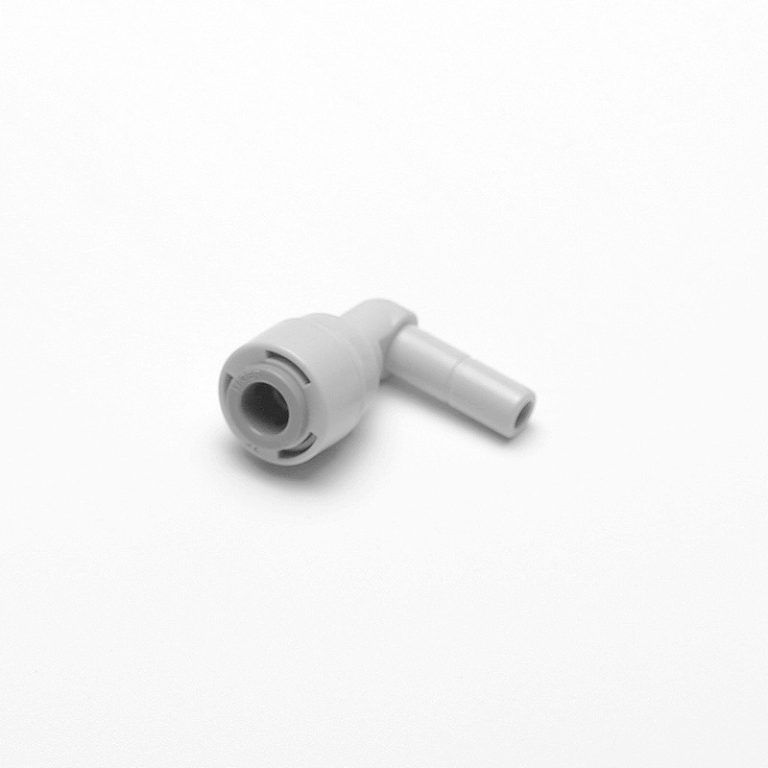
Once the copper pipe is cut to the correct length, insert the plastic push fit fitting onto the end of the pipe. Push the fitting onto the pipe until it reaches the stop inside the fitting. It is important to push the fitting on straight and evenly to ensure a secure connection. Do not twist or turn the fitting as this could cause damage to the O-ring seal inside the fitting.
After the fitting is securely in place on the copper pipe, test the connection by pulling on the fitting to ensure that it is properly seated. If the fitting does not come off easily, it is likely that the connection is secure. However, it is always a good idea to check for leaks by running water through the pipe and inspecting the connection for any signs of water seepage.
If there are no leaks, the connection is successful, and you can proceed with your plumbing project. If there are leaks, you may need to re-cut the copper pipe and try again. It is important to follow the manufacturer’s instructions for the specific type of plastic push fit fitting you are using to ensure a proper connection.
In conclusion, connecting plastic push fit fittings to copper pipes is a straightforward process that can be easily accomplished with the right tools and techniques. By following the steps outlined in this article, you can ensure a secure and leak-free connection that will stand the test of time. Whether you are a seasoned DIY enthusiast or a beginner plumber, mastering the art of connecting plastic push fit fittings to copper pipes will open up a world of possibilities for your plumbing projects.