Table of Contents
فوائد الترقية إلى موصل خرطوم الدش المصنوع من الفولاذ المقاوم للصدأ
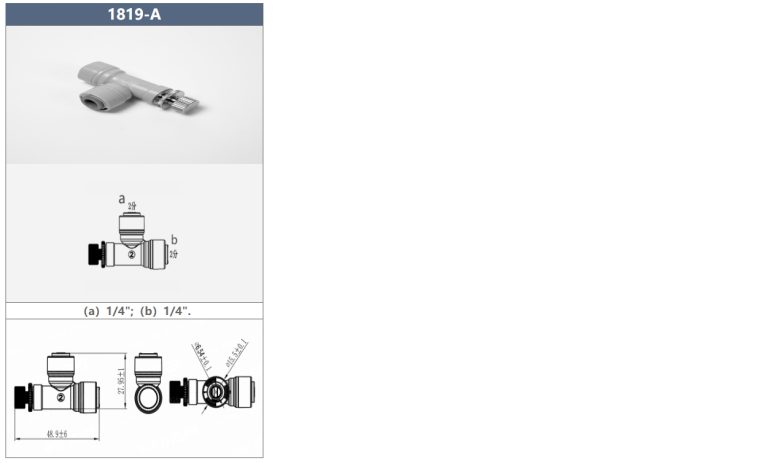
نموذج الموصل
الحجم أ
| الحجم ب | الحجم ج | 1821-ه | كيفية تركيب وصيانة موصلات خرطوم الدش بشكل صحيح |
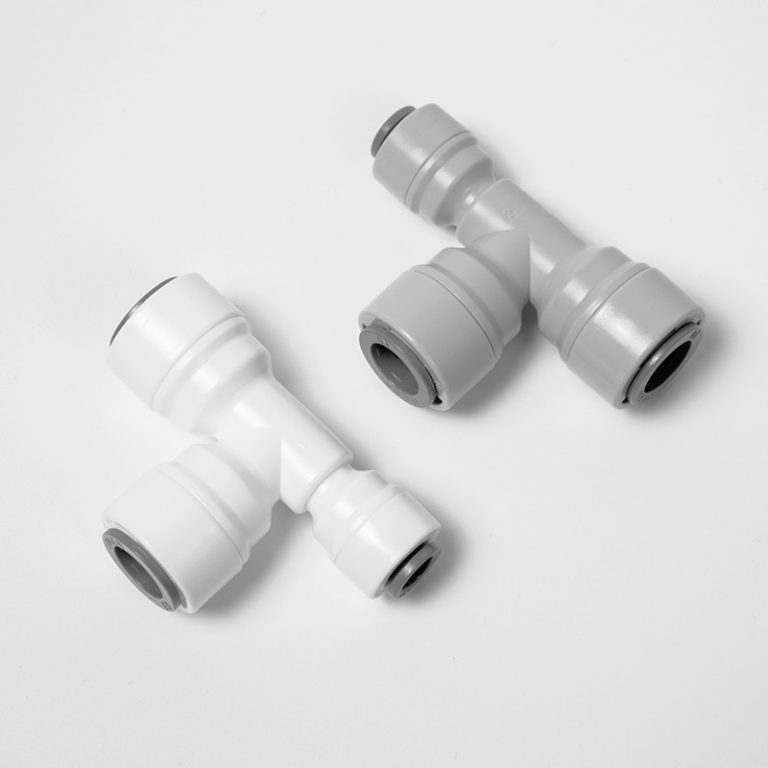
| تعد موصلات خرطوم الدش مكونًا أساسيًا في أي نظام دش، مما يسمح بتوصيل خرطوم الدش بإمدادات المياه. يعد التثبيت والصيانة الصحيحة لهذه الموصلات أمرًا ضروريًا لضمان تجربة استحمام فعالة وخالية من التسرب. سنناقش في هذه المقالة كيفية تركيب موصلات خرطوم الدش وصيانتها بشكل صحيح للحفاظ على تشغيل الدش بسلاسة.
عند تركيب موصلات خرطوم الدش، من المهم التأكد أولاً من إيقاف تشغيل مصدر المياه. سيؤدي ذلك إلى منع تسرب أي ماء أثناء عملية التثبيت. بمجرد إيقاف إمداد المياه، يمكنك البدء بإزالة موصل خرطوم الدش القديم، إن أمكن. استخدم مفتاح ربط لفك الموصل وإزالته بعناية من أنبوب إمداد المياه. |
1/2″ | 3/8″ | 1/2″ |
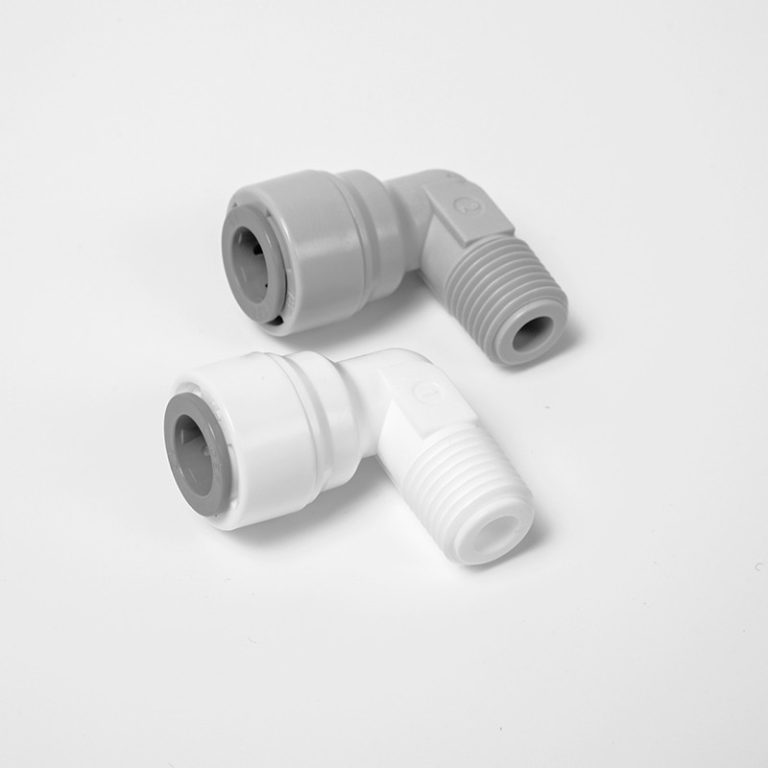
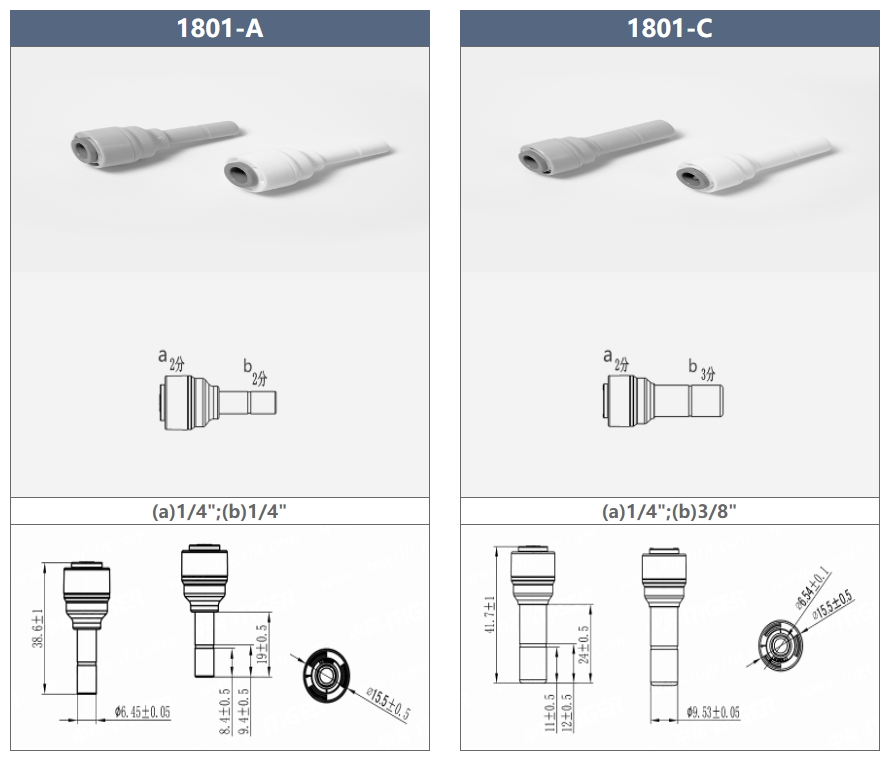
نموذج
أنبوب (أ)
الجذعية (ب)
1801-أ
| 1801-ج | بعد تركيب موصل خرطوم الدش، قم بتشغيل مصدر المياه مرة أخرى وتحقق من عدم وجود أي تسرب. إذا لاحظت أي تسرب، قم بإحكام ربط الموصل أكثر أو أعد وضع شريط السباك لإنشاء ختم أفضل. بمجرد أن يصبح الموصل مانعًا للتسرب، يمكنك توصيل خرطوم الدش واختبار تدفق المياه للتأكد من أن كل شيء يعمل بشكل صحيح.
للحفاظ على موصلات خرطوم الدش، من المهم التحقق بانتظام من وجود أي تسرب أو علامات تآكل. افحص الموصلات بحثًا عن أي شقوق أو تآكل أو تلف قد يؤثر على أدائها. إذا لاحظت أي مشاكل، استبدل الموصلات على الفور لمنع أي تسرب أو تلف بسبب المياه. بالإضافة إلى ذلك، يوصى بتنظيف موصلات خرطوم الدش بانتظام لإزالة أي تراكم لبقايا الصابون أو الرواسب المعدنية. استخدم محلولًا خفيفًا من الصابون والماء لتنظيف الموصلات، مع الحرص على عدم استخدام أي منظفات كاشطة قد تؤدي إلى تلف اللمسة النهائية. اشطف الموصلات جيدًا وجففها تمامًا قبل إعادة توصيل خرطوم الدش. في الختام، يعد التثبيت والصيانة الصحيحة لموصلات خرطوم الدش أمرًا ضروريًا لضمان تجربة دش فعالة وخالية من التسرب. باتباع الخطوات الموضحة في هذه المقالة، يمكنك تركيب وصيانة موصلات خرطوم الدش بسهولة. تذكر إيقاف تشغيل مصدر المياه قبل التركيب، واستخدام شريط السباك لإغلاق مانع لتسرب الماء، والتحقق بانتظام من وجود تسربات أو علامات تآكل. مع العناية المناسبة، ستوفر موصلات خرطوم الدش سنوات من الخدمة الموثوقة. |
Stem(b) |
|---|---|---|
| 1801-A | 1/4 | 1/4 |
| 1801-C | 1/4 | 3/9 |
Next, clean the threads of the water supply pipe to remove any debris or old sealant. This will ensure a tight seal when installing the new shower hose connector. Apply plumber’s tape to the threads of the water supply pipe to create a watertight seal. Wrap the tape around the threads in a clockwise direction, overlapping the tape as you go.
Once the plumber’s tape is applied, you can now install the new shower hose connector. Carefully thread the connector onto the water supply pipe, making sure it is tight and secure. Use a wrench to tighten the connector, being careful not to over-tighten as this can cause damage to the connector or water supply pipe.
After the shower hose connector is installed, turn the water supply back on and check for any leaks. If you notice any leaks, tighten the connector further or reapply plumber’s tape to create a better seal. Once the connector is leak-free, you can attach the shower hose and test the water flow to ensure everything is working properly.
To maintain shower hose connectors, it is important to regularly check for any leaks or signs of wear. Inspect the connectors for any cracks, corrosion, or damage that may affect their performance. If you notice any issues, replace the connectors immediately to prevent any leaks or water damage.
Additionally, it is recommended to clean the shower hose connectors regularly to remove any buildup of soap scum or mineral deposits. Use a mild soap and water solution to clean the connectors, being careful not to use any abrasive cleaners that may damage the finish. Rinse the connectors thoroughly and dry them completely before reattaching the shower hose.
In conclusion, proper installation and maintenance of shower hose connectors are essential to ensure a leak-free and efficient shower experience. By following the steps outlined in this article, you can install and maintain shower hose connectors with ease. Remember to turn off the water supply before installation, use plumber’s tape for a watertight seal, and regularly check for leaks or signs of wear. With proper care, your shower hose connectors will provide years of reliable service.